
This article is part of a series created in partnership with SiteGround. Thank you for supporting the partners who make SitePoint possible.
WordPress’ success owes much to its quick and simple five-minute installation procedure. Yet the MySQL database still causes confusion for many.
This tutorial describes how to create a database using cPanel, a popular platform management utility offered by many web hosts. We’ll also discuss how to use this database during a WordPress installation. The techniques can be used by any web application which requires MySQL.
Let’s start with the basics and terminology…
Contents
What is a Database?
A database is a collection of organized data. That’s it. WordPress stores all its page, post, category and user data in a database.
MySQL is a database management system (DBMS). It is software which allows you to create, update, read and delete data within a database. A single MySQL installation can manage any number of self-contained databases. You could have one for WordPress, another for Magento, and others for Drupal or whatever you need.
There are plenty of alternatives but MySQL became popular for several reasons:
- it is free, open source software. It is now owned by Oracle but there are open MySQL-compatible options such as MariaDB.
- it became synonymous with PHP – the web’s most-used language/runtime which powers WordPress. Both PHP and MySQL appeared in the mid-1990s when web development was in its infancy.
- it adopts Structured Query Language (SQL) – a (fairly) standard language for creating data structures and data.
- it is fast, simple to install and has many third-party development tools.
How do Applications Access a Database?
Applications such as WordPress access their data via a database connection. In the case of MySQL, WordPress’ PHP code can only establish a connection when it knows:
- the address where MySQL is installed
- the name of the database it needs to access
- a user ID and password required to access that database
A database “user” account must be defined for WordPress use. It can have a very strong password and set appropriate database permissions.
How is Data Stored?
MySQL and other SQL databases store data in relational tables.
For example, you may have a set of article posts. Each post will have unique data, such as the title and body text. It will also have data used in other posts, such as the category and author details. Rather than repeat the same data again and again, we create separate tables:
- an
authortable containing an ID, the author’s name and other details - a
categorytable containing an ID and the category name - a
posttable containing the article title and body text. It would point to the author and category by referencing the associated ID number.
SQL databases implement safeguards to guarantee data integrity. You should not be able to reference an author ID which does not exist or delete a category used by one or more articles.
These table definitions and rules form a database schema. A set of SQL commands execute during WordPress installation to create this schema. Only then are the tables ready to store data.
How to Create a Database
Web hosts using cPanel provide a web address (such as https://site.com/cpanel), and a user ID and password to gain access. Keep these details safe. Do not confuse them with the database or WordPress user credentials!
If you’re looking for a host that supports cPanel, try SiteGround, our web host of choice. All plans support cPanel, and they’ve re-skinned the dashboard to organize everything in a more friendly way.
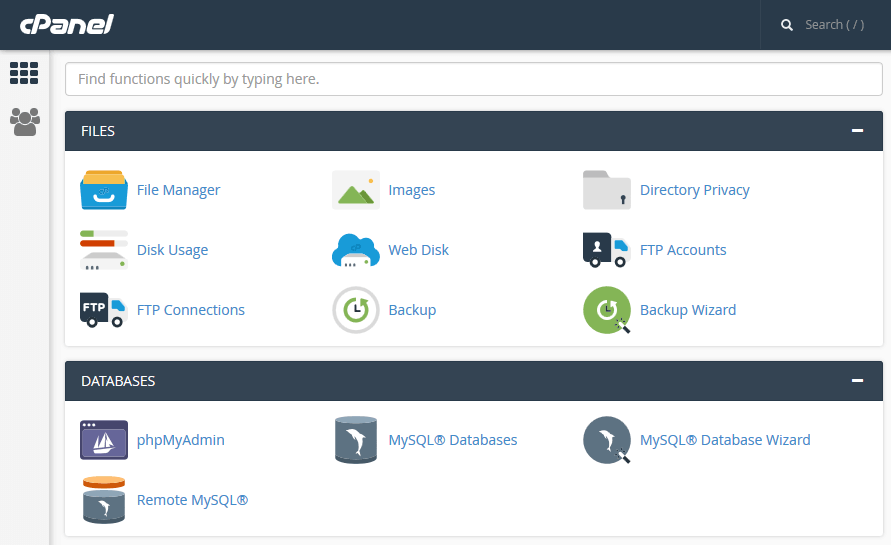
You view may look a little different but locate the DATABASES section or enter “MySQL” in the search box.
Click the MySQL Database Wizard and follow the steps:
Step 1: Choose a Database Name
Your database requires a name:
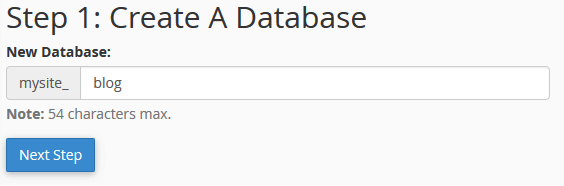
The name may have a prefix applied, such as mysite_. Enter an appropriate name such as blog or wordpress and hit Next Step.
Step 2: Create a Database User
You must now define the MySQL user account which WordPress uses to access your database:

Note the user name may also have the same prefix applied (mysite_). In this screenshot, our user ID is mysite_blogDBuser.
cPanel will ensure you enter a strong password. The password can be complex; you will use it only once during WordPress installation. I recommend the random Password Generator:
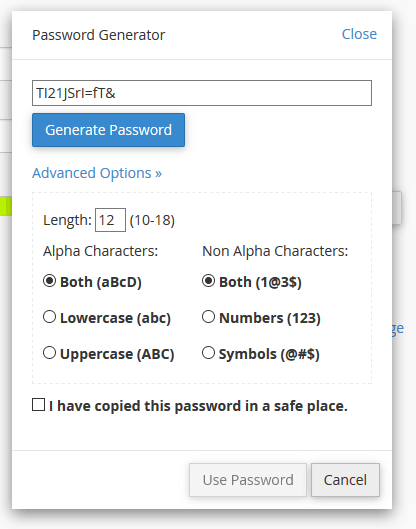
Make sure you copy the user ID and password to a text file or another safe place before hitting Create User.
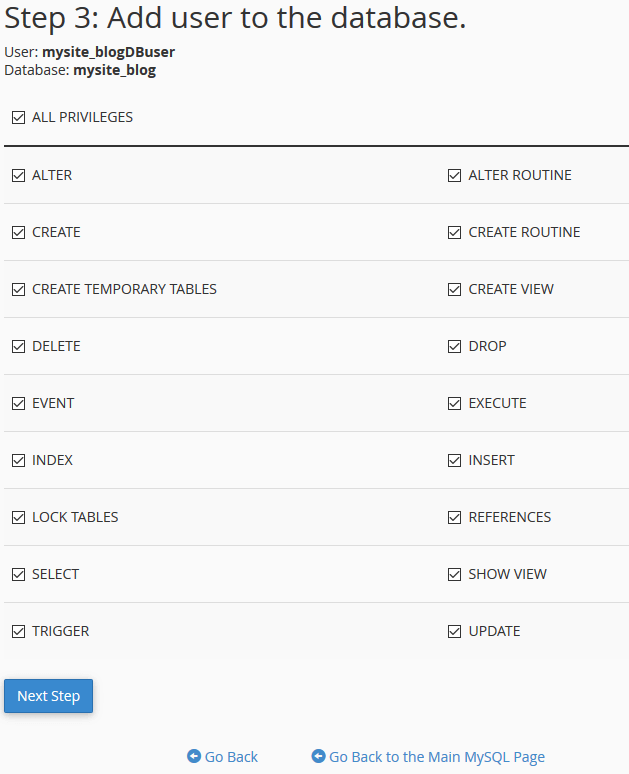
Step 3: Set the Database User Privileges
The user created above requires full access to the database during WordPress installation. It runs scripts to create tables and populate them with the initial data.
Check ALL PRIVLEGES then hit Next Step:
cPanel will confirm creation of the MySQL database and user.
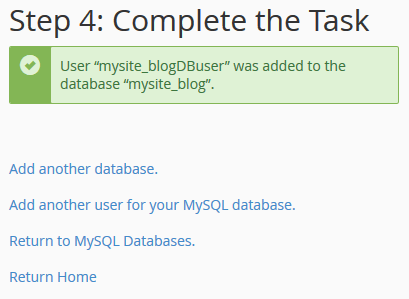
The MySQL Databases Panel
You can use the MySQL Databases panel instead of the wizard. It still allows you to create a database and user, but you then add that user to the database.
It also provides facilities to update, repair and delete databases and users.
How to Install WordPress
Your cPanel may provide WordPress and other application installers. It may not be necessary to follow the steps above because the script creates a database for you.
If manual installation is necessary or preferred, download WordPress and extract the files. You may be able to do this on your server via SSH but FTP/SFTP is also supported.
Open a browser and navigate to the domain/path where you copied WordPress, (i.e. http://mysite.com/). This starts the installation:
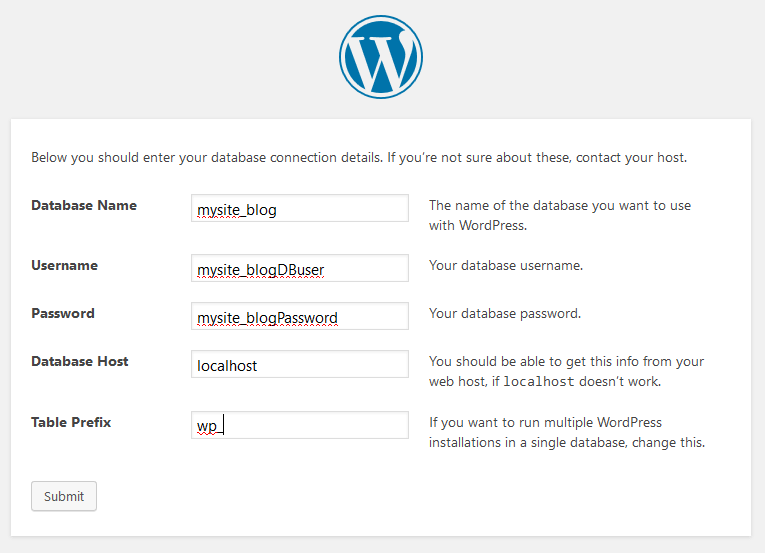
You must enter:
- the MySQL Database Name created in step 1
- the MySQL database Username created in step 2
- the MySQL database user’s Password created in step 2
- the Database Host. This is the address of the server where MySQL runs. It will often be
localhostor127.0.0.1because MySQL is running on the same server where your site is hosted. Your host will advise you if this is different.
The Table Prefix adds a short string to the start of all table names. Change it when:
- You want to install many copies of WordPress which all point to the same database, and/or
- You want to make your installation a little more secure by making table names less obvious.
Hit Submit and WordPress will verify your credentials before continuing installation.
Create a WordPress User
WordPress prompts for the ID, password and email address of a WordPress administrator. This is someone responsible for managing WordPress. It is different to the MySQL database and cPanel credentials!
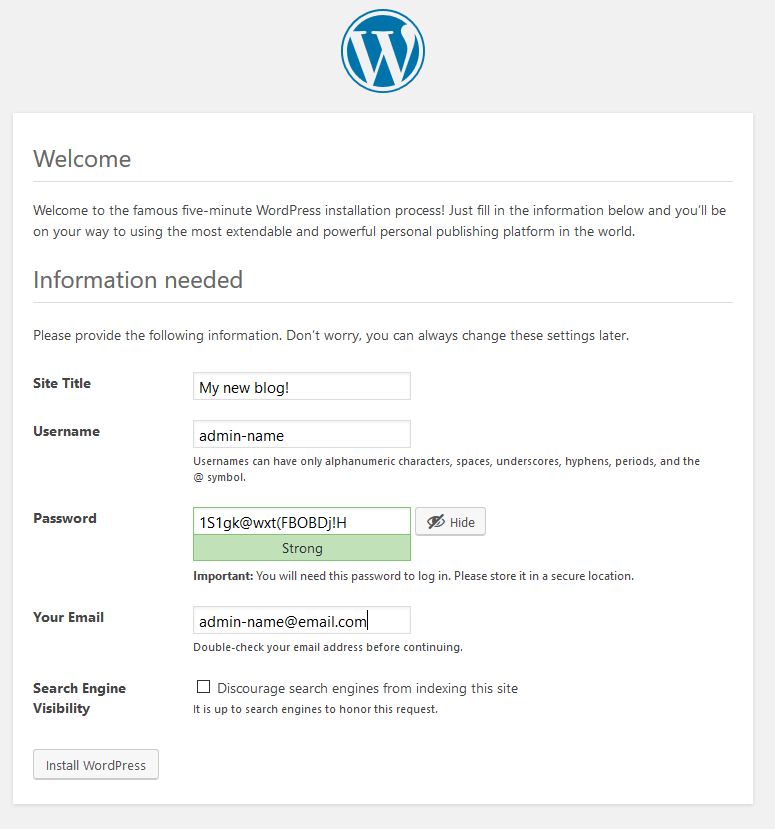
Hit Install WordPress and the dashboard will appear within a few seconds.
Bonus Security Step
We granted full permission to the database user for WordPress installation. You can downgrade these privileges after installation to improve security.
The following rights should be adequate:
- SELECT
- INSERT
- UPDATE
- DELETE
- ALTER
- CREATE TABLE
- DROP TABLE
- INDEX
Some plug-ins may need extra rights so enable ALL PRIVILEGES if you encounter problems.
[“Source-sitepoint”]
