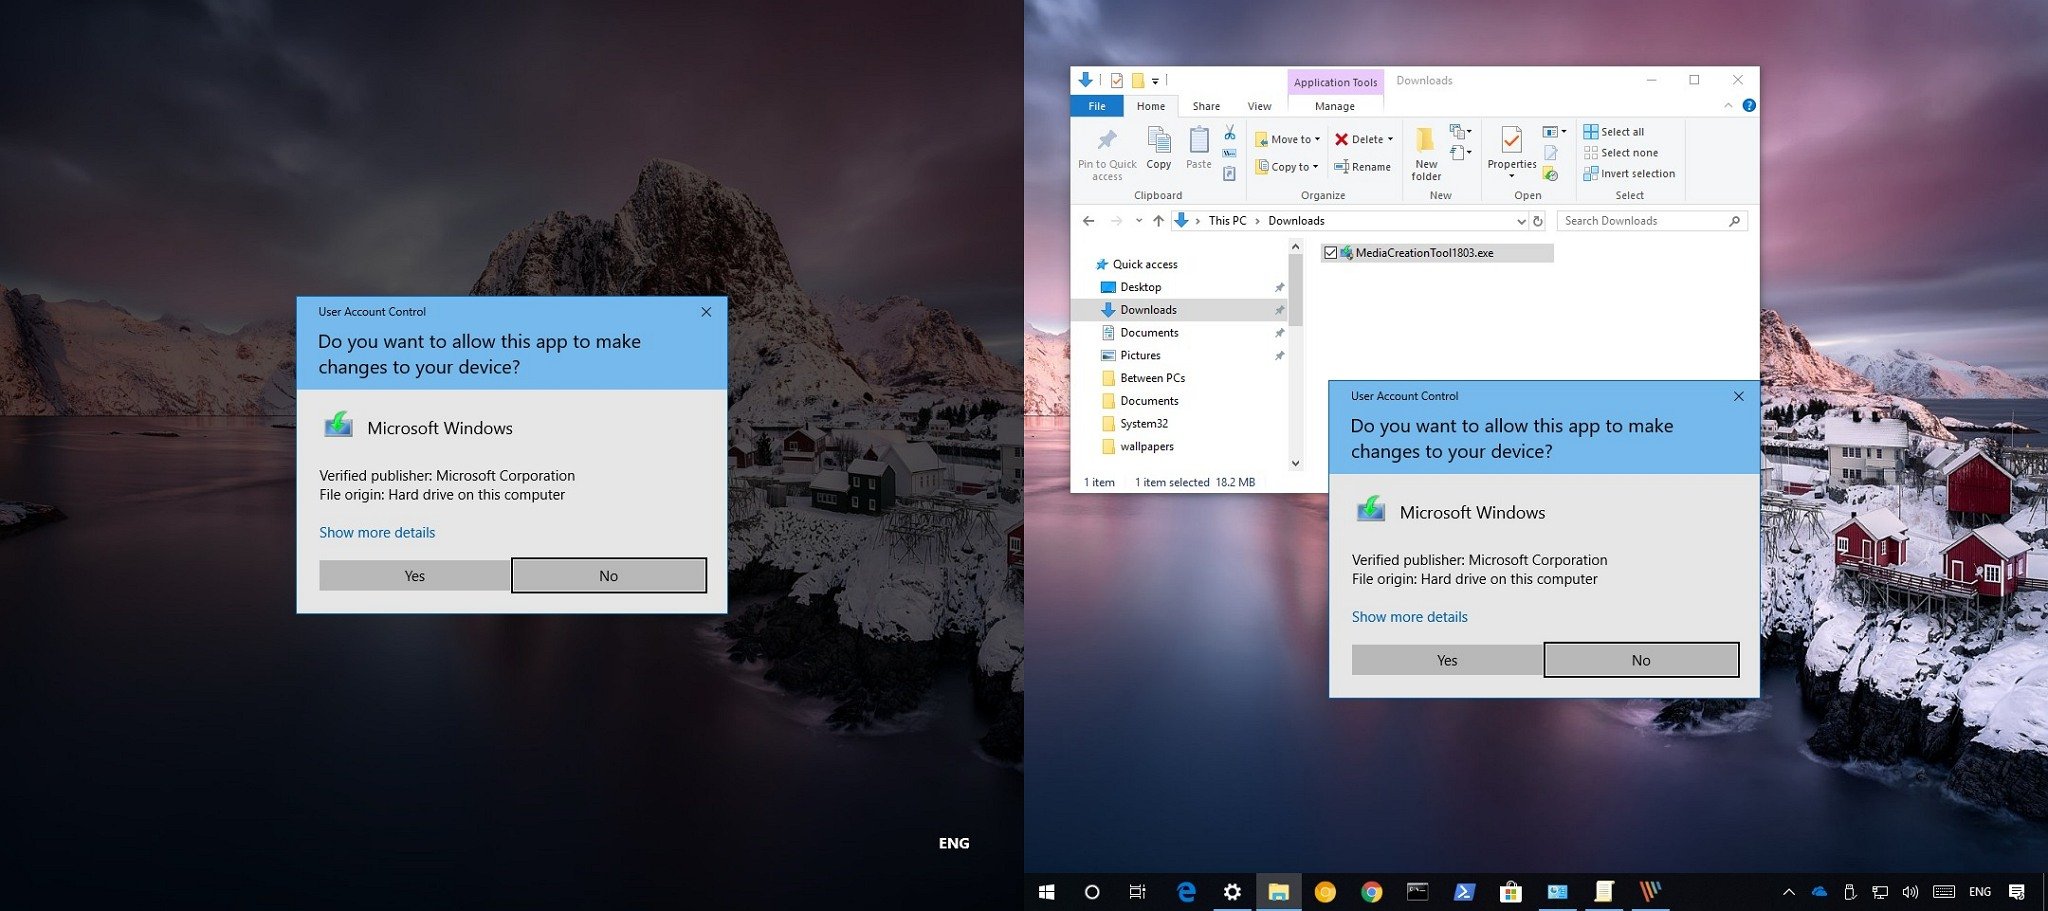
On Windows 10, the User Account Control (UAC) feature works as an additional security layer to prevent malicious code from running undetected on your device. If the feature is enabled (by default it is), when an app requires administrator access, Windows 10 will display an elevation prompt requesting the user to approve or deny the action.
Depending on your settings, you probably noticed that when an app requires elevation, the user desktop dims to display the UAC prompt, and then you’re temporarily blocked from the desktop until an administrator allows or denies the request, which is a mechanism that Microsoft calls “secure desktop.”
If you’re noticing that dimming is taking a significant amount of time, or you prefer to retain an interactive desktop, you can disable the dimmed secure desktop using the User Account Control settings, Local Group Policy Editor, or Registry.
In this Windows 10 guide, we’ll walk you through the steps to allow access to the desktop and any of the applications you may be running during a User Account Control prompt.
- How to disable secure desktop for UAC using Control Panel
- How to disable secure desktop for UAC using Group Policy
- How to disable secure desktop for UAC using Registry
Contents
How to disable secure desktop for UAC using Control Panel
If you want to be able to interact with the desktop when you get a User Account Control prompt, you can use the following steps:
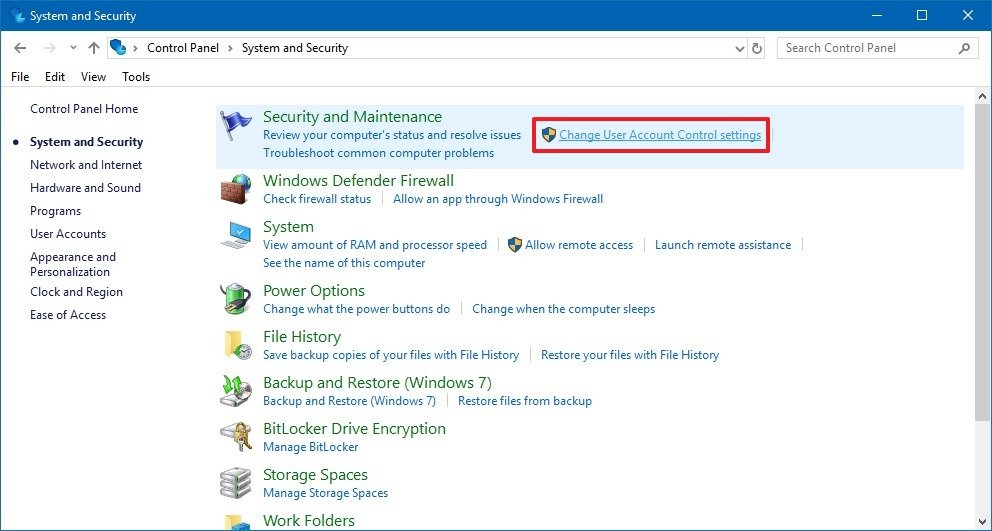
- Open Start.
- Click on System and Security.
- Click the Change User Account Control settings option.

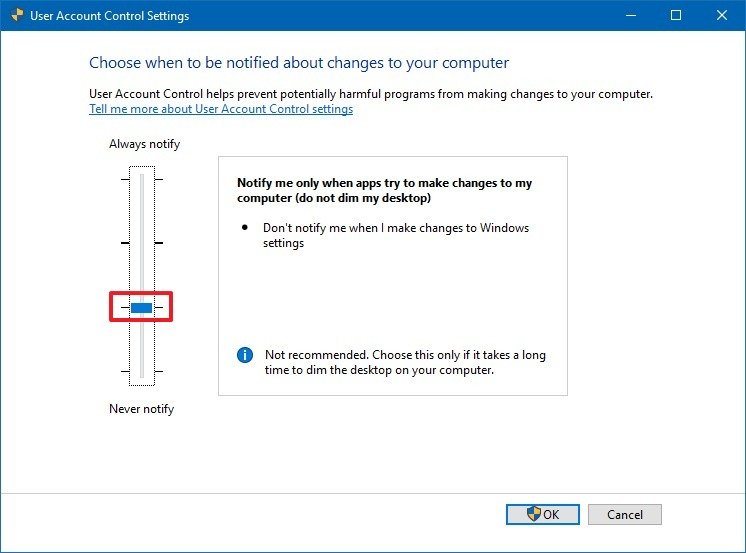
- Adjust the slider to the third position: Notify me only when apps try to make changes to my computer (do not dim my desktop).

- Click OK.
After completing the steps, you’ll continue to get an elevation prompt request when apps try to make changes to your device, but you’ll still be able to interact with the desktop.
You can always reverse the setting by restoring the slider to its previous position.
How to disable secure desktop for UAC using Group Policy
Alternatively, if you’re running Windows 10 Pro, you can use the Local Group Policy Editor to disable the dimmed secure desktop behavior using these steps:
- Use the Windows key + R keyboard shortcut to open the Run command.
- Type gpedit.msc and click OK to open the Local Group Policy Editor.
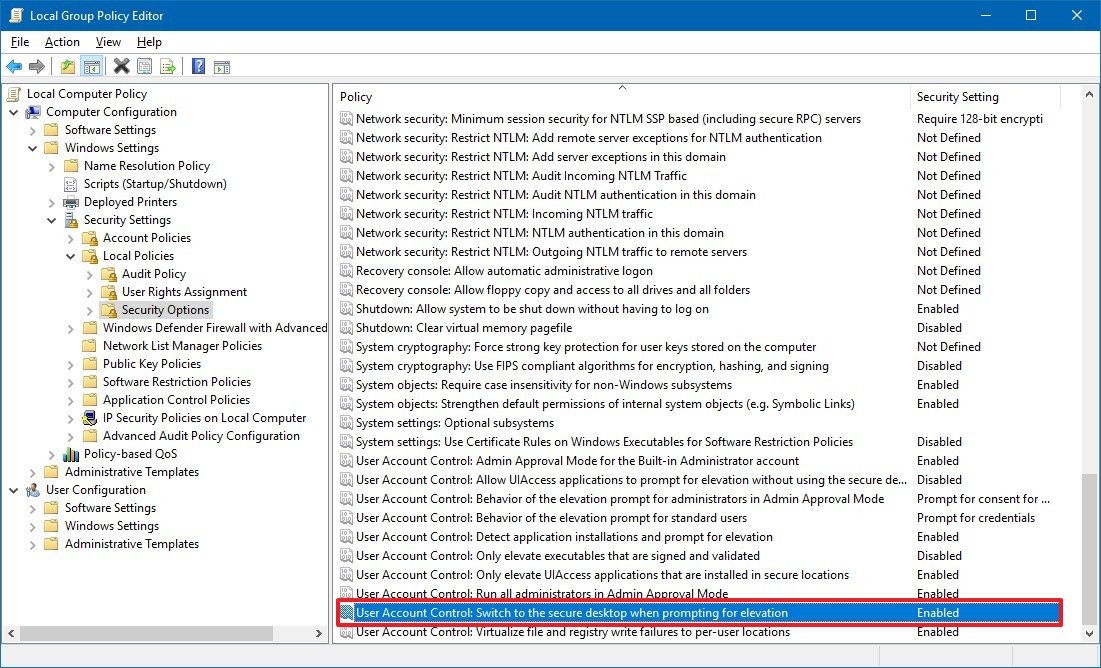
- Browse the following path:
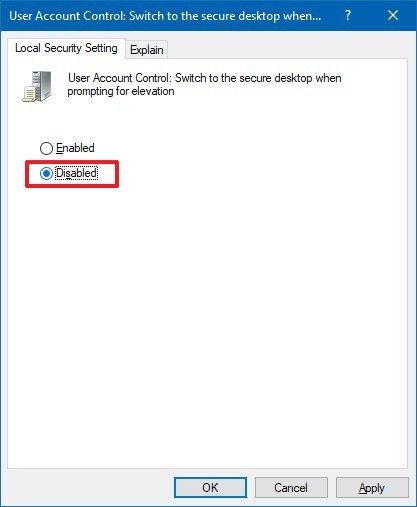
Computer Configuration > Windows Settings > Security Settings > Security Options - On the right side, double-click the User Account Control: Switch to the secure desktop when prompting for elevation policy.

- Select the Disabled option.

- Click Apply.
- Click OK.
Once you’ve completed the steps, when you get a User Account Control prompt, you’ll still be able to access the desktop and other apps.
If you want to revert the changes, you can use the same instructions, but on step No. 5, make sure to select the Enabled option.
How to disable secure desktop for UAC using Registry
In the case you’re running Windows 10 Home, you won’t have access to the Local Group Policy Editor, but you can still disable the dimmed secure desktop behavior on Windows 10 by modifying the Registry.
Warning: This is a friendly reminder that editing the Registry is risky, and it can cause irreversible damage to your installation if you don’t do it correctly. It’s recommended to make a full backup of your PC before proceeding.
- Use the Windows key + R keyboard shortcut to open the Run command.
- Type regedit, and click OK to open the Registry.
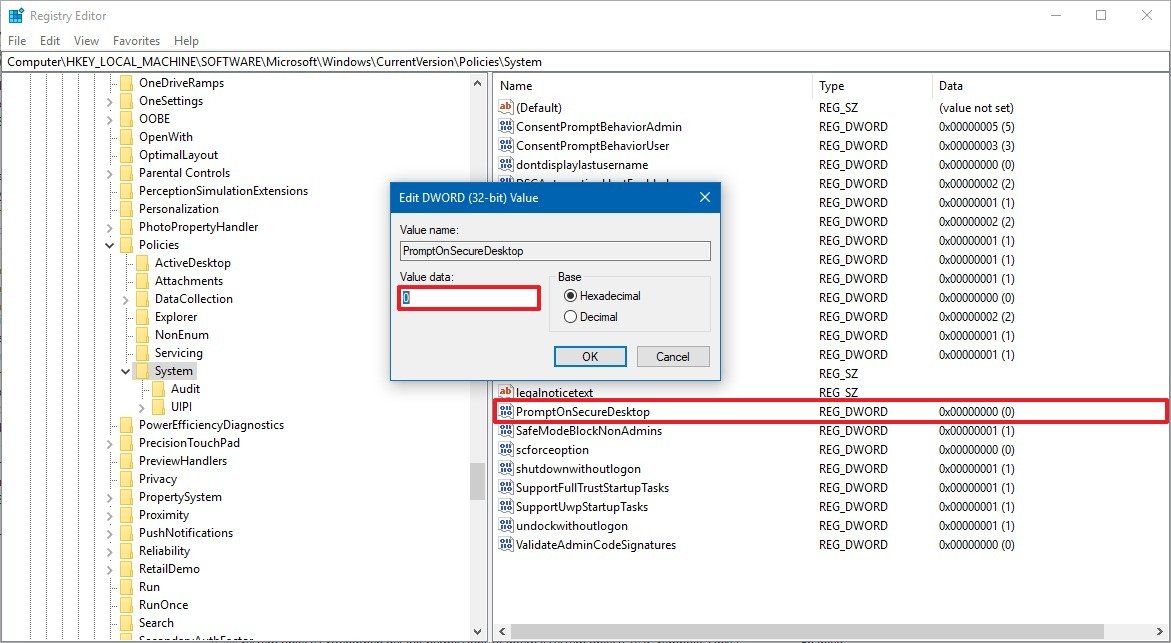
- Browse the following path:
HKEY_LOCAL_MACHINE\SOFTWARE\Microsoft\Windows\CurrentVersion\Policies\SystemQuick Tip: On Windows 10, you can now copy and paste the path in the Registry’s address bar to quickly jump to the key destination.
- Right-click the System (folder) key, select New, and click on Key.

- Name the key PromptOnSecureDesktop and press Enter.
- Double-click the newly created DWORD and make sure the value is set to 0.
- Click OK.

After completing the steps, when trying to run a command, executable, or change settings that requires elevation, you’ll get the prompt, but you’ll still be able to interact with the desktop.
If you want to go back to the previous settings, you can use the same instructions, but on step No. 6, make sure that the value for PromptOnSecureDesktop is set to 1.
We’re focusing this guide on Windows 10, but you can also refer to these instructions to stop the User Account Control experience from dimming your desktop when you get an elevation prompt in Windows 8.1 and Windows 7.
Source:-windowscentral.

